
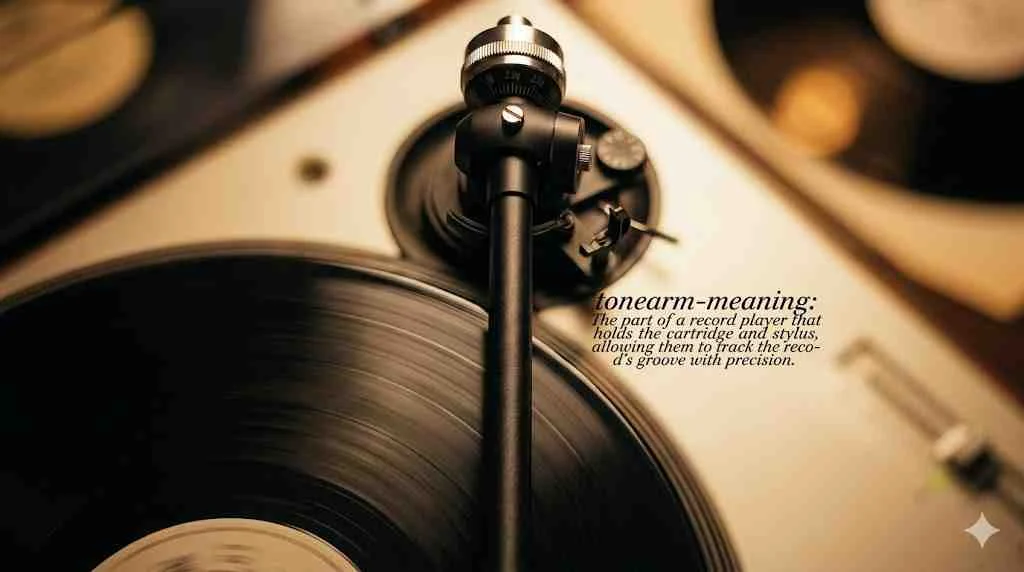
A tonearm is the pivoted arm on a turntable that holds the cartridge and stylus (needle) over the vinyl groove. It balances tracking force, manages anti-skate, and carries the tiny electrical signal from your record to your amplifier making it the mechanical heart of vinyl playback.
You love vinyl for its warmth, its crackle, its soul. But have you ever looked at that skinny arm holding the needle and wondered what it really does? That piece is the tonearm.
The tonearm meaning goes far beyond “the thing that holds the stylus.” It’s a precision mechanical bridge. On one side sits a physical record groove. On the other? Your amplifier and speakers. Without a properly functioning tonearm, your favorite record becomes an expensive coaster.
This guide breaks down everything. You’ll learn what a tonearm is, how it works, its critical parts, and why setup determines sound quality. No textbook language. No fluff. Just clear, useful knowledge.
Let’s drop the needle.
What Is a Tonearm?
Let’s start with a simple tonearm definition. A tonearm is the pivoted or linear-tracking arm on a turntable or record player. It holds the cartridge and stylus (the needle) over the vinyl record. Its job? Allow that stylus to trace the record’s grooves as accurately as possible.
Think of it like a train on a track. The groove guides the stylus. But the tonearm keeps the train from derailing. It applies just enough downward force. It counters sideways pull from friction. And it carries the tiny electrical signal from the cartridge to your amp.
People also call it the “record player needle arm.” That’s the everyday name. But the record player tonearm meaning includes so much more than just the needle. It’s the whole assembly: arm tube, bearings, counterweight, anti-skate, and internal wiring.
In short: no tonearm, no music.
Why the Tonearm Meaning Matters More Than You Think
Most beginners focus on speakers or the cartridge. Big mistake. The turntable tonearm function dictates how much information the stylus can extract from the groove. A great cartridge on a bad tonearm sounds awful. A basic cartridge on a well-setup tonearm can surprise you.
Here’s why.
The record groove is tiny. Really tiny. Its width is about the thickness of a human hair. Inside that groove, the stylus moves left, right, up, and down. These microscopic motions become your music. If the tonearm wobbles, skips, or presses too hard, you lose detail. You also damage the record.
So the tonearm in record player explained simply: it’s a quality control device for analog playback. Get it right and vinyl sings. Get it wrong and you’ll hear distortion, skipping, and premature groove wear.
How a Tonearm Works | Step by Step
Let’s walk through the signal path. This will cement the how tonearm works concept.
Step 1: The stylus rides the groove
Your record’s groove has wavy walls. The stylus sits inside those walls. As the record spins, the groove pushes the stylus back and forth.
Step 2: Vibration travels to the cartridge
The stylus connects to a tiny cantilever. That cantilever links to a magnet or coil inside the cartridge. Each wiggle becomes a vibration.
Step 3: Cartridge converts vibration to electricity
Inside the cartridge, the moving magnet or coil creates a small electrical signal. This signal mirrors the original soundwave shape. It’s very weak only a few millivolts.
Step 4: Tonearm wiring carries the signal
The signal travels through ultra-thin wires inside the tonearm. These wires run from the cartridge pins down to the turntable’s RCA outputs.
Step 5: Phono preamp boosts the signal
Your amplifier’s phono input or an external phono preamp boosts the signal to line level. It also applies RIAA equalization to restore bass frequencies.
Step 6: Amplifier and speakers play the sound
Now the signal is strong enough. Your amp sends it to speakers. You hear music.
Every single step depends on the tonearm doing its mechanical job perfectly. No wobbles. No excess pressure. And no misalignment.
The Main Parts of a Turntable Tonearm
You can’t understand parts of a turntable without naming each piece. Here’s a clean table with every major component and its job.
| Component | What It Does |
|---|---|
| Arm tube | The long metal or carbon fiber tube. Holds everything together. |
| Headshell | A small mount at the front. Holds the cartridge. Removable on some tonearms, fixed on others. |
| Cartridge | Converts groove vibrations into electrical signal. Contains stylus and cantilever. |
| Stylus (needle) | The tiny tip that touches the record. Usually diamond or sapphire. |
| Bearings | Allow the arm to move smoothly. Gimbal (two-axis) or unipivot (single-point) designs. |
| Counterweight | A weight at the back. Balances the arm and sets tracking force. |
| Tracking force dial | A numbered ring. Lets you apply precise downward pressure after balancing. |
| Anti-skate mechanism | A small weight, spring, or magnet. Pulls outward to counter the inward skating force from groove friction. |
| Lift/lower lever | A lever that gently raises and lowers the arm. Prevents dropping the stylus like a rock. |
| Internal wiring | Thin copper or silver wires. Carry the audio signal from cartridge to RCA jacks. |
| Base mount | Where the arm attaches to the turntable chassis. Can be fixed or removable. |
Each part works as a team. If one fails, the whole system suffers.
Tonearm Tracking Force | The Goldilocks Zone
Tonearm tracking force is the downward weight the stylus applies to the record. Measured in grams (g). Most moving magnet cartridges need 1.5 to 2.5 grams. Moving coil cartridges sometimes need more: 2.0 to 3.5 grams. DJ cartridges can go up to 5 grams.
Too light? The stylus bounces in the groove. You’ll hear skipping, distortion, or no sound at all. Too heavy? You’ll crush the groove walls. Bass gets muddy, highs disappear, and the record wears out fast.
The right force hits a sweet spot. The stylus stays in the groove without excessive pressure.
How to set tracking force:
- Balance the tonearm so it floats level. Turn the counterweight until the arm sits parallel to the platter.
- Without moving the counterweight, rotate the numbered dial to zero.
- Turn the entire counterweight (or a separate ring) to the recommended force. For example, 2.0 grams.
- Double-check with a digital tracking force scale. Dial accuracy varies.
Pro tip: Those $15 digital scales on Amazon are worth every penny. Don’t trust the dial alone.
Tonearm Balance Adjustment | Start Here
Before tracking force comes tonearm balance adjustment. This is step zero. Balance means the arm floats freely with no downward or upward pressure.
How to balance a tonearm:
- Remove the stylus cover (don’t skip this).
- Lower the anti-skate to zero.
- Turn the counterweight until the arm hovers level. It should stay still when you let go. No drifting up or down.
- Now you’re ready to set tracking force.
Balancing feels awkward the first time. That’s normal. Take it slow. A perfectly balanced arm is the foundation of good sound.
Tonearm Cartridge and Stylus | The Dynamic Duo
The tonearm cartridge and stylus work as a pair. You can’t separate them.
Cartridge types:
- Moving Magnet (MM): Most common. Replaceable stylus. High output. Works with most phono preamps.
- Moving Coil (MC): Lower output. Non-replaceable stylus. Needs a step-up transformer or special preamp. More detailed but more expensive.
- Moving Iron (MI): Rare hybrid. Some swear by it for midrange clarity.
Stylus shapes:
- Conical (spherical): Basic. Tracks okay but wears records faster. Cheap.
- Elliptical: Better. Contacts more groove wall. Less distortion.
- MicroLine / Shibata: Advanced. Traces high-frequency grooves accurately. Expensive but long-lasting.
Match your cartridge compliance to your tonearm mass. High compliance cartridges (soft suspension) need light tonearms. Low compliance cartridges (stiff suspension) need heavy tonearms. Wrong pairing causes bass roll-off or tracking errors.
Why Tonearm Alignment Importance Can’t Be Ignored
The tonearm alignment importance is huge. Alignment means positioning the cartridge so the stylus sits perfectly perpendicular to the groove walls. Two angles matter: overhang (stylus distance from the platter center) and azimuth (vertical tilt of the stylus).
Bad alignment causes:
- Distortion on inner tracks
- Channel imbalance (one speaker louder)
- Sibilance (harsh “s” and “sh” sounds)
- Uneven record wear
How to align:
- Print a free alignment protractor from sites like Vinyl Engine.
- Place the protractor on your platter. Lower the stylus onto the grid.
- Adjust the cartridge forward/backward and left/right until it matches the grid lines.
- Tighten the headscrews. Recheck.
Aligning takes patience. Budget 20 minutes. Your ears will thank you.
Different Tonearm Types | Which One Do You Own?
Not all tonearms are the same. Here are the main tonearm types you’ll encounter.
Pivoted (gimbal) tonearm
The most common type. Uses two sets of bearings one for vertical movement, one for horizontal. Reliable, easy to use, and forgiving. Found on 90% of home turntables.
Unipivot tonearm
A single sharp point bearing. Very low friction. Extremely sensitive to vibration and leveling. Needs careful setup. Loved by audiophiles for speed and detail.
Straight tonearm
The arm tube is straight. Often used on DJ turntables (like Technics SL-1200). Low mass. Good for scratching but requires careful alignment.
S-shaped tonearm
Curved like an “S.” Classic 1970s design. Often has a removable headshell. Slightly higher mass. Very forgiving.
Linear tracking tonearm
The arm moves straight across the record on rails. No tracking error (the angle stays perfect). Complex mechanics. Hard to repair. Found on high-end vintage players like some Bang & Olufsen models.
J-shaped tonearm
A hybrid between straight and S-shape. Less common but offers a good balance of low mass and alignment stability.
Don’t chase the “best” type. A well-setup $50 tonearm outperforms a poorly setup $500 tonearm every time.
The Phonograph Tonearm Function | A Brief Reality Check
The phonograph tonearm function hasn’t changed much since the 1950s. The physics are the same. What changed? Materials, bearings, and wiring.
Modern tonearms use:
- Carbon fiber tubes for rigidity and low resonance
- Precision ball or needle bearings
- Silver or OCC copper internal wiring
- Machined aluminum counterweights
But the core job remains: hold the cartridge, let it move freely, and apply correct pressure. Vintage doesn’t mean bad. A well-maintained 1970s tonearm can still sound fantastic.
Tonearm Setup Guide | A Step-by-Step Walkthrough
Here’s a real tonearm setup guide from start to finish. No skipping steps.
Tools you’ll need:
- Digital tracking force scale ($15–30)
- Alignment protractor (free printout)
- Small Phillips screwdriver
- Stylus brush
- Level (a small bubble level)
Step 1: Level your turntable
Place a bubble level on the platter. Adjust the feet until it’s perfectly flat. A tilted turntable ruins everything.
Step 2: Install the cartridge
Mount the cartridge in the headshell. Hand-tighten screws first. Don’t fully tighten yet.
Step 3: Set overhang
Use the protractor. Position the stylus on the grid. Slide the cartridge forward or back until it matches.
Step 4: Set azimuth
Look from the front. The stylus should sit straight up and down. No lean. Some tonearms have azimuth adjustment screws. If not, use thin shims between cartridge and headshell.
Step 5: Tighten screws
Once alignment is perfect, tighten the screws firmly. Don’t strip them. Recheck alignment. Tightening can shift the cartridge.
Step 6: Balance the arm
Set anti-skate to zero. Turn the counterweight until the arm floats level.
Step 7: Set tracking force
Rotate the dial to zero (without moving the counterweight). Then turn the counterweight to the recommended force. Use the digital scale to confirm.
Step 8: Set anti-skate
Set anti-skate to the same number as tracking force. For example, 2.0 grams force = 2.0 anti-skate. Fine-tune by ear later.
Step 9: Test with a clean record
Play a familiar album. Listen to the inner tracks. Any sibilance or distortion? Adjust anti-skate slightly up or down.
Step 10: Recheck after 10 hours
New cartridges settle. Recheck alignment and tracking force after the first 10 plays.
That’s it. Done right, this takes 30–40 minutes. Done wrong, you’ll fight bad sound forever.
Common Tonearm Mistakes Beginners Make
Let’s list the real-world errors. Avoid these and you’re ahead of 80% of vinyl listeners.
Mistake 1: Forgetting to balance before setting tracking force
If you skip balance, your tracking force dial reads wrong. You’ll crush or starve your records.
Mistake 2: Leaving anti-skate at zero
Without anti-skate, the arm pulls inward. Distortion on the right channel gets worse toward the record center.
Mistake 3: Using the same force for every cartridge
Different cartridges need different weights. Read the specs. Don’t guess.
Mistake 4: Ignoring alignment
“I’ll do it later” becomes never. Alignment takes 10 minutes. Poor alignment damages records permanently.
Mistake 5: Dropping the stylus with the cue lever
Lifting and dropping by hand risks breaking the cantilever. Use the lever every single time.
Mistake 6: Cleaning records with the tonearm in place
You’ll vibrate the stylus. Unnecessary wear. Move the arm to its rest before cleaning.
Why Tonearm Matters in Vinyl Playback | The Final Word
The why tonearm matters in vinyl playback question has a simple answer: accuracy. The record groove holds an incredible amount of information. Frequencies from 20 Hz to 20 kHz. Dynamic range from whispers to drum hits. Left and right channels separated by 45-degree groove walls.
The tonearm’s job is to let the stylus trace that groove without adding or removing anything. No extra resonance. No uneven pressure.
A good tonearm makes the cartridge disappear. You hear the recording, not the machine.
A bad tonearm colors everything. Bass gets bloated or thin. Highs sound harsh or rolled off. The soundstage collapses into a narrow blob between your speakers.
Invest your time in setup before you spend money on upgrades. A $300 turntable with a perfectly set up tonearm beats a $1,000 turntable with sloppy alignment. Every time.
Quick Troubleshooting: What’s That Noise?
| Problem | Likely Cause | Fix |
|---|---|---|
| Skipping on loud passages | Tracking force too light | Add 0.2g force |
| Inner groove distortion | Poor alignment or anti-skate | Realign cartridge; increase anti-skate slightly |
| One channel quieter | Azimuth off or bad wiring | Check azimuth; clean cartridge pins |
| Constant crackle not on record | Static electricity | Use anti-static brush; add a humidifier |
| Needle jumps at start of record | Anti-skate too high | Reduce anti-skate |
| Muffled bass | Tracking force too heavy | Reduce force by 0.3g |
| Sibilance on “S” sounds | Stylus wear or alignment | Check stylus under microscope; realign |
FAQs
1. What is a tonearm in simple terms?
A tonearm is the stick-like arm on a record player that holds the needle. It keeps the needle in the record groove, applies the right amount of pressure, and sends the musical signal to your speakers.
2. Is the tonearm the same as the needle arm?
Yes. “Needle arm” is the everyday name. Tonearm is the technical term. Both refer to the entire assembly not just the needle itself.
3. Can I play a record if my tonearm is broken?
No. Without a working tonearm, the stylus can’t track the groove correctly. You’ll get no sound, skipping, or permanent record damage. Don’t try it.
4. How often should I adjust my tonearm?
Check alignment and tracking force whenever you install a new cartridge. Otherwise, recheck every 6–12 months or after moving the turntable. Stylus wear and seasonal changes can shift settings slightly.
5. Does a more expensive tonearm sound better?
Not automatically. A $200 tonearm that’s perfectly set up beats a $2,000 tonearm with bad alignment. Price gets you better bearings, lower resonance, and finer adjustments but only if you use them correctly.
Conclusion
You came here looking for a tonearm meaning. Now you know it’s not just a definition. It’s a whole system of balance, pressure, geometry, and signal flow.
Respect the tonearm. Learn its parts. Set it up carefully. And your records will reward you with decades of beautiful sound.
The vinyl record tonearm purpose is simple: deliver the groove to your ears with honesty. No shortcuts. No magic. Just physics and care. Now go check your alignment. Your favorite album is waiting.
Discover More Related Articles:
- “Cap” Slang Meaning: From Street Language to Social Media in 2026
- “Glaze” Meaning Slang: What It Really Means in Internet Conversations In 2026
- “67” Meaning Slang: How It’s Used in Online Conversations In 2026